Search This Blog

Showing posts with label British Food. Show all posts

Sunday, February 14, 2010

Yorkshire Pudding

IMG_5024

I have always wondered why the British seem to refer to everything as pudding. Pudding can be a dessert, a savoury meat dish (blood pudding) or a baked good such as Yorkshire pudding. Being Canadian a pudding always makes me think of a soft custard based dessert. Anyone have any idea why the word “pudding” has become such a culinary catchall in Britain? Anyways, given my love of all things British, Yorkshire puddings were next on my list of things that I wanted to make.

IMG_4991

This recipe was ridiculously easy to make. The ingredients: flour, salt and dried rosemary. You can leave the rosemary out but I toss it in on a whim.

IMG_4993

In a bowl to the side: eggs, melted butter and milk mixed together. Traditionally pan drippings would have been used instead of the melted butter which would of course have give it much better flavour. Note to self: start saving pan drippings.

IMG_4994

The wet and the dry ingredients then made their acquaintance.

IMG_4996

When it was all mixed together it was extremely soupy.

IMG_5003

I forgot to mention that before you pour the batter into the ramekins you need to pour a teaspoon of oil into each and put them in the oven until they’re sizzling hot. The batter was so runny that I was worried that they were not going to rise.

IMG_5006

I should have had more faith because halfway through the cooking time they were coming along nicely.

IMG_5008

Nice and golden. I have no idea why they were lopsided though. Very weird.

IMG_5011IMG_5022

We ate them with sausages and gravy which made a most appropriate accompaniment. They were nice and crisp on the outside and fluffy and eggy on the inside. They were perfect for mopping up stray gravy on my plate. Next time I make a roast beef I am definitely making this on the side.

del.icio.us Tags:

Wednesday, January 13, 2010

Blueberry Shortbread Bars

IMG_4942

Last week I was looking in the freezer and realized that we have four bags of frozen blueberries. I have the unfortunate habit of always buying too much extra food, especially since there is only the two of us to feed (The Husband and myself). I could easily go a few weeks without buying any extra groceries. At least if we are ever snowed in we will be ok.

Since I wanted to start using up my frozen blueberries before freezer burn got to them I decided to make this recipe. The recipe comes from here. The original recipe has almonds and blackberries but since The Husband is allergic to nuts and hates blackberries I decided to christen them Blueberry Shortbread Bars.

IMG_4914

Instead of creaming together regular sugar and butter this recipe starts off with icing sugar and butter.

IMG_4916

All creamed together.

IMG_4919

I then added cinnamon and vanilla extract instead of almond extract.

IMG_4920

Then the flour in two batches. The original recipe calls for ground almonds but I just substituted an equal amount of flour.

IMG_4921

After I added the first batch it was crumbly.

IMG_4922

After the second batch it was positively powdery. At this point I was peering doubtfully at the contents of the bowl wondering if the mixture was going to hold together.

IMG_4923

After a lot of pressing in the pan it held together with no problems. I just used my fingers but I suppose you could use the bottom of a glass to do this.

IMG_4926

I added the blueberries on top. I didn’t bother to thaw them.

IMG_4927

The recipe calls for reserving a cup of the shortbread mixture to crumble on top of the fruit. In order to give it some texture I grabbed small handfuls of the mix and compressed them in my hands before crumbling them on top. This way I ended up with bigger pieces and smaller pieces.

IMG_4928

After the bars came out of the oven I let them cool down and then sprinkled them with icing sugar to finish them off.

IMG_4940IMG_4941

This is the kind of dessert that you make for your elderly aunt who doesn’t like sugary desserts. In my case I made this for The Husband who likes desserts of all degrees of sweetness. The crust is buttery and the topping is fairly thin so it doesn’t overwhelm the shortbread. This is not a super sweet dessert (I’m a fan of super sweet things), so I merely found it ok but The Husband really liked this. This recipe was really simple to make and requires only a few basic ingredients. It is something that can be made on the spot as long as you have some frozen fruit in the fridge. Now I just have to think of something else to do with all the other bags of fruit!

Technorati Tags: ,,

Monday, January 11, 2010

Beef Wellington

IMG_4793

Beef Wellington is named after the Duke of Wellington who defeated Napoleon at the Battle of Waterloo to celebrate his victory. It also happens to be damn tasty. This something I made for New Year’s day and The Husband being a meat lover he was really happy with this dish. I was expecting this to be harder than it actually was and was pleasantly surprised that it wasn’t that difficult. The recipe I used is here. The one thing about this dish is that it can be a bit pricy. We waited until beef tenderloin was on sale and bought a piece and froze a few weeks before I made it. This is really great for a special occasion and feeds an army.

IMG_4739

First up was making the mushroom duxelles which is basically a paste made up of finely chopped mushrooms, French shallots, garlic, thyme and butter.

IMG_4741

I so had to take out three quarters of the mushrooms that I had put in the food processor in the first picture; I had gotten overly ambitious. I blitzed them in batches along with two French shallots until they were finely chopped but not mushy.

IMG_4742

I then threw them in a pan along with thyme, salt, pepper and roasted garlic paste. I let them cook until they were done and the liquid had mostly evaporated.

IMG_4745

Next I seared the beef tenderloin on all sides. It was a bit tricky to do the sides but I grabbed it with a pair of tongs and held it in place to do it.

IMG_4751 

This recipe is a meat lover’s dream. Meat, wrapped in more meat.

IMG_4753

The tenderloin had to be slathered in the mushroom mixture and then covered in prosciutto. In order to do this and not have everything slide off everything had to be put together and then wrapped tightly in plastic wrap so it could hold its shape.

IMG_4754 

I put a large piece of plastic wrap on the counter and then laid the prosciutto out in a thick blanket. I then spread the cooled duxelles on top.

IMG_4755 

I took my tenderloin and rubbed it with Dijon mustard and placed it in the middle.

IMG_4756

The next part was little tricky. I grabbed the sides of the plastic wrap and yanked everything together really tightly until it made a nice meaty package. I then put it in the fridge to set and hold its shape.

IMG_4774

The pastry was easy since I didn’t actually make it. Frozen puff pastry is my friend. I will tackle trying to make it one day, eventually. I took two packages and rolled them out big enough to cover the meat. See how the prosciutto/mushroom/beef package is holding together without coming apart?

IMG_4775

I then folded up the sides to make a pastry envelope, cut slashes on top and brushed it with beaten eggs. This then went in the oven. To make sure it was not overcooked I stuck a meat thermometer in. I have one of those kinds that has an end that you put in your meat, you leave it in, shut the oven door and then you attach it to your base which gives you your temperature.

IMG_4768

While the Beef Wellington was cooking I made the gravy. I ran out of shallots so I sautéed onions instead.

IMG_4771

I added brandy. Lots of brandy.

IMG_4773

Preserved green peppercorns.

IMG_4772

Then garlic, thyme, salt, pepper, cream and beef broth.

IMG_4779

I cranked it up to a boil and let it reduce for a bit.

IMG_4780

In the oven along with the beef I was also making roasted potatoes.

IMG_4789IMG_4787IMG_4786

The puff pastry turned nice and golden. A little overdone on the ends. Oops.

IMG_4792IMG_4794

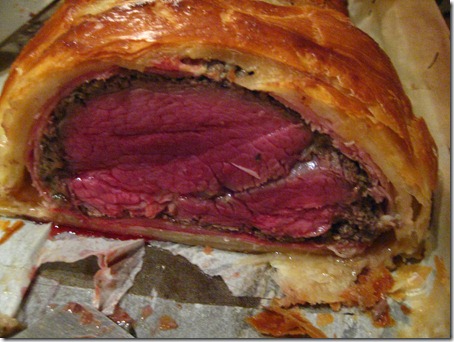
For me the meat was perfectly done. Not too red but not overcooked either. The combination of the flaky pastry along with the salty prosciutto, the garlicky mushrooms and the tender beef was phenomenal. After I snapped the last picture I doused my plate with gravy. The Husband was a huge fan of this meal. Usually he doesn’t like eating too many portions of leftovers but this time he said he would “sacrifice himself” in a very “generous” manner. I have promised him that I will most definitely make this again in the future. If you’re feeling flush with cash (beef tenderloin + prosciutto adds up) this is a great main course to make for a special occasion.

Friday, December 4, 2009

Cranberry Scones- Windsor Arms Recipe

IMG_3615IMG_3599IMG_3607

I love scones. Truly, dearly, madly love scones, specially with Devonshire cream and raspberry jam. That my friends, is bliss on a plate. The best scones I have ever had were at the Windsor Arms hotel during high tea which I posted about previously. This weekend I had a craving for scones and happily, I found the recipe online when I tried googling it. Here is the recipe with some of my changes:

THE WINDSOR ARMS' FAMOUS SCONES

(Makes 16 to 20)

- 4 cups (1 L) flour, sifted three times with 2 tbsp (30 mL) baking powder

- ¼cup (60 mL) sugar

- ¼ tsp (1 mL) salt

- ½cup (125 mL) unsalted butter, cut into ½-inch pieces

- 2 eggs, room temperature, beaten to blend

- 1 cup (250 mL) milk or buttermilk (or more as needed)

- A handful of cranberries/chocolate chips/anything else you want to add in (optional)

1. Preheat oven to 450F (200C). Grease and flour baking sheets. Sift flour, sugar and salt into a deep bowl. Cut in butter until mixture resembles coarse meal. Add any extra mix-ins (chocolate chips/dried fruit etc). Blend in eggs and just enough milk or buttermilk to form soft but not sticky dough.

2. Turn dough out onto lightly floured surface. Gently roll or pat dough to about ½-inch thickness, lightly flouring as necessary to prevent sticking. Cut out rounds using two-inch floured biscuit cutter. Set scones ½ inch apart on prepared baking sheets. Brush with cream. Bake until scones are golden brown, 12 to 15 minutes. Serve immediately with Devonshire cream, jam or marmalade.

IMG_3559

Ok. I have to confess: I didn’t sift my flour three times. Yes, I am a bad food blogger. What can I say, I just don’t have that kind of time. I also ended up using my food processor to cut in the butter even though one of my friends claims that not using a pastry cutter to do this is sacrilege. This recipe makes quite a bit of scones so I ended up dumping the butter and flour mixture into one of my gigantic metallic bowls.

IMG_3563

I added a lot more sugar than is called for in the original recipe as my dried cranberries were unsweetened. I just eyeballed the amount.

IMG_3567IMG_3572

One this I always do is to make sure to beat eggs together before adding them to dry ingredients in recipes. For whatever reason this does make a difference, mostly because if you don’t beat them together beforehand the yolks and the whites do not incorporate evenly into the dough. I also added enough milk to get everything to come together and a bit more. I added a little extra on purpose so it was a bit sticky as I planned to roll them out. Whenever you roll anything out, cookies, scones etc they will always absorb some of the flour which you are using on your counter to keep them from sticking. If you leave the dough slightly on the sticky side you can make sure that they don’t pick up too much flour and dry out.

IMG_3574

My trusty biscuit cutter; because after a while you get tired of using a glass to cut things out.
IMG_3575

IMG_3582 

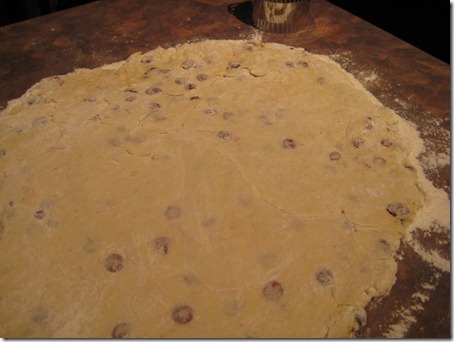
The dough was nice and soft and rolled out very smoothly. I ended up using my two biggest baking sheets and a pyrex pan to hold all of the scones.

IMG_3585

Here they are baking away in the oven.

IMG_3588IMG_3607

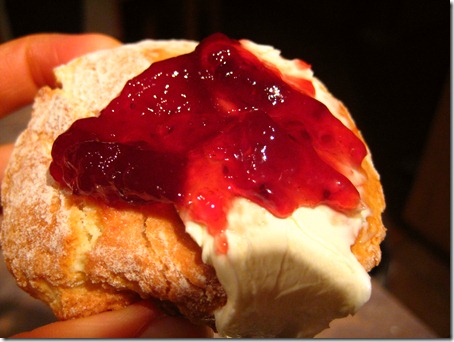
Once they came out of the oven I had to resist the urge to bite into them immediately since I needed to slather them with the two very necessary ingredients without which a scone is not complete.

IMG_3591

I bought this jar of Devonshire cream at Whole Foods in Toronto and had been keeping it stashed in my fridge until the opportune moment. When I spied it in the fridge at the store I practically jumped up and down with glee. If you haven’t tasted this on a warm scone then you haven’t lived.

IMG_3593

Bonne Maman Four Fruit jam is my favourite and I am forever scouring the grocery store shelves for it. They sell this brand in my supermarket but for some reason this particular flavour is rarely in stock. The cute little jar makes me feel like yuppie whenever I eat it.

IMG_3596IMG_3618IMG_3612

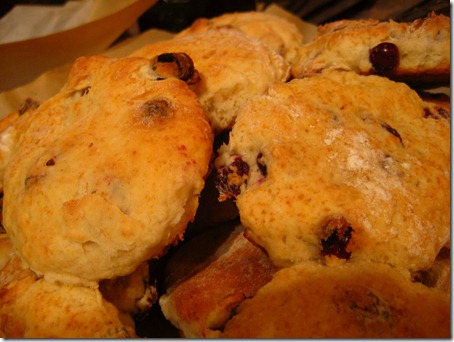
These scones were so incredibly good. They were not too sweet and were fluffy, light and tender inside. Next time however, I am making them thicker. I rolled them out to 1/2 inch but had some at the end which were an inch thick and they had an even better texture.

IMG_3621IMG_3624

Since the scones were a little too thin to cut in half I took two and made a Devonshire cream and jam sandwich to bring to work as a snack the next day. It definitely gave me something to look forward to during my day!

Blog Widget by LinkWithin